
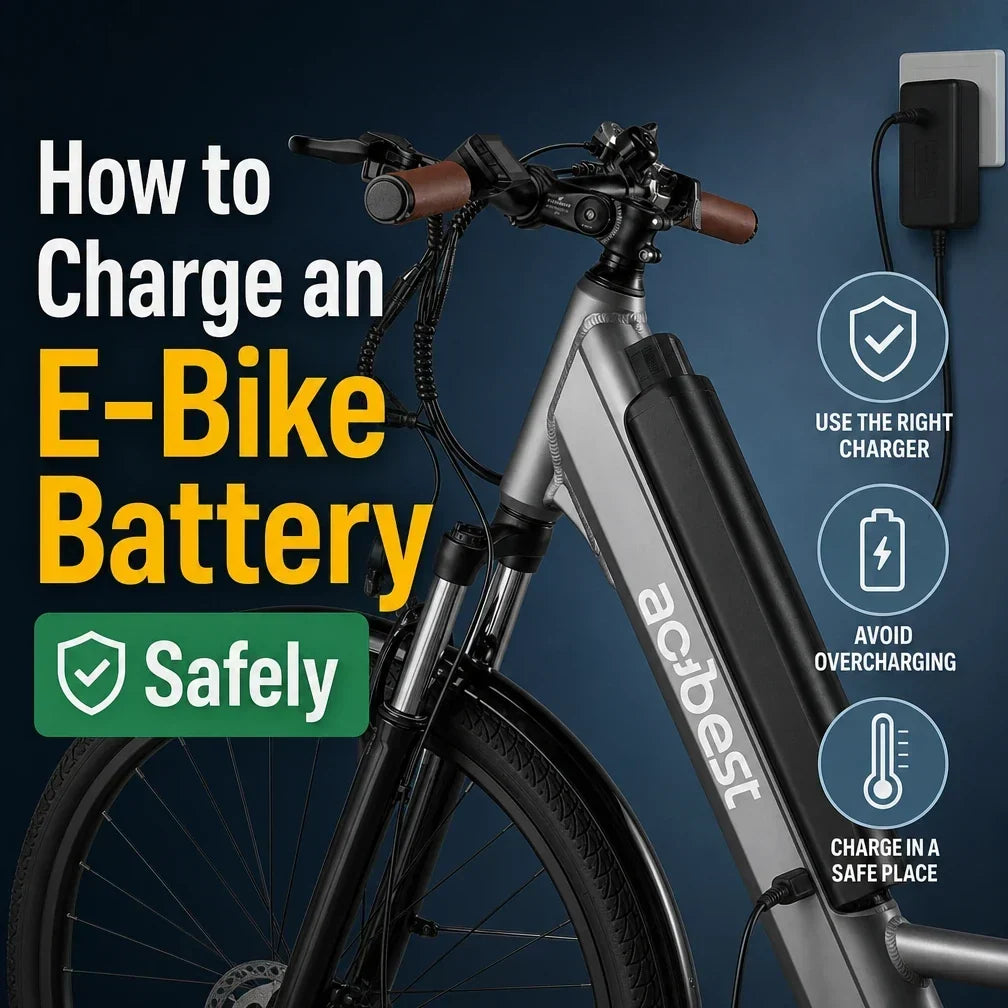
Use the charger supplied or specifically approved for your battery, inspect the equipment first, follow your model's connection order, and remain present while it charges. Disconnect when charging is complete as the manual instructs. Don't charge while sleeping or away from home, as NYC Emergency Management's e-bike safety guidance advises.
If your battery is already full and you won't ride for weeks, don't improvise a way to discharge it. Disconnect the charger normally if the equipment is undamaged, check the battery's storage instructions, and use the storage section below. Smoke, unusual heat, swelling, leaking, odor or odd battery noises are a different situation: stop using it and follow the emergency guidance, not the storage routine.
How to Charge an E-Bike Battery: Quick Answer
The Safe General Sequence
For a normally functioning bike and battery, the sequence is simple. Inspect the equipment and charging location. Use the charger supplied or specifically approved for that pack. Follow the exact manual's connection order, stay present, read the charger's own indicator instructions, and disconnect when finished. If the manual and a generic article differ, the model instructions control.
The preparation matters as much as the plug-in step. A battery with physical warning signs does not belong in an ordinary charging routine. Nor does a bike or battery that may have taken water inside. Those cases need the stop-use guidance below.
What Not to Do
- Don't use a "universal" charger, adapter or another bike's charger because the connector looks right.
- Don't leave the battery charging while you sleep or are away, block an exit, or cover the charger.
- Don't open a pack, probe its terminals, modify wiring or run a motor on a stand to change its charge level.
- Don't treat a cool or dry-looking battery as safe if it is swollen, leaking, unusually hot, odorous, noisy or possibly water-damaged.
Before You Plug In
Inspect the Battery and Charger
Look at the case, cable, plug and charging port without opening anything. Check for cracks, dents, a split case seam, damaged insulation, melted areas, bent contacts, corrosion or moisture. If a connector no longer seats normally, don't force it. A visible defect or suspected water intrusion needs attention before another charge; don't connect a charger to a wet port.
The U.S. Fire Administration identifies excessive heat, changed shape or color, unusual odor, leakage and odd noises as reasons to stop using a lithium-ion battery. Don't charge a suspect pack to find out whether it still works. If any of these warning signs appears, get clear and follow the emergency section below, even if the battery is cool or not in use.
This is an external visual check, not a request to touch an overheated pack or lean over it to smell for trouble. If you already see smoke, smell an unusual odor or hear hissing, leave it alone and move yourself away. Photographs, serial numbers and warranty paperwork can wait.
Choose a Suitable Charging Place
Use a permitted, dry location away from combustible items and with exits clear. Keep the charger uncovered and use the power supply specified for it. FDNY recommends a direct wall-outlet connection, no extension cord, and no charging in bedrooms or near escape routes.
Check both the building's rules and your bike's model instructions. Permission to park a bike is not permission to charge it. A removable battery is not automatically exempt from a residence-hall or apartment rule.
For campus housing, our certification and location-permission guide helps you ask the right office about the bike, battery and charger before planning a charge there.
Keep the area clear enough to leave without moving the bike if something goes wrong. I'd schedule charging for a time when I can stay present, rather than make it the last job before bed. A spare outlet in a stairwell or hallway is not a useful charging spot.
Hot, Cold and Wet Are Not the Same Condition
An otherwise healthy pack that is simply outside its manual's charging temperature range needs the conditions specified by that manual before charging. Don't apply a universal 30-minute or one-hour wait. Let it adjust naturally in a permitted location; do not use a heater, hair dryer, freezer or direct sun to hurry it.
Unusual heat is different from a pack that is merely warm after ordinary use. If it is excessively hot, swollen, leaking, odorous or making odd sounds, do not set a timer and try again. Follow the stop-use and emergency branch. After rain, distinguish normal exterior moisture from suspected water inside the port or housing. A dry exterior alone cannot settle the second case.
Before an ordinary charge, check these separately:
| Check | Continue only when | Pause or stop when |
|---|---|---|
| Case and port | They are intact and the connection seats normally | There is damage, corrosion, moisture inside the port or a forced fit |
| Temperature | The otherwise healthy pack meets its manual's charging conditions | It is outside the permitted range, or shows abnormal heat or another warning sign |
| Place and power | Charging is permitted, the exit stays clear and the approved charger reaches a suitable wall outlet | The setup needs an extension cord, blocks a route out or violates site rules |
| Supervision | You can remain awake and present through the charge | You are leaving or going to sleep before it finishes |
Match the Charger to the Battery
A fitting plug and a matching nominal voltage do not prove compatibility. Start with the charger supplied for your exact battery or an explicitly approved replacement. FDNY's guidance calls for the manufacturer's power adapter made specifically for the device.
If you're missing the original, send ACTBEST the bike model, purchase details and clear photos of the battery and charger labels through our contact page. Keep order and serial numbers private. Ask us to identify the approved replacement before buying one.
Don't use an adapter to make a connector fit, modify the pack, or test a similar-looking charger from another bike. The same rule applies to a replacement battery: obtain a confirmed battery-and-charger match for the exact bike, not just a listing that says "48V." Our ACTBEST replacement-battery guide sets out what to ask before ordering.
A Compatibility Check You Can Actually Complete
- Identify the equipment. Record the full bike model and variant, battery label and charger label. If equipment has been replaced, don't assume the original-bike listing describes it.
- Find the approval. Match the charger supplied for that pack or obtain a specific manufacturer confirmation for the replacement. A shared nominal voltage, current rating, connector shape or safety mark cannot supply that missing approval.
- Check condition and instructions. The approved charger still needs an intact cable and housing, a permitted outlet, and the correct connection and indicator instructions for the actual equipment.
- Pause on a mismatch. If a label differs from the manual or the seller's reply names another generation, ask ACTBEST to resolve it before connecting anything.
Electrical ratings can help support identify a part, but they do not authorize a substitute on their own.
Why a "Universal" Charger Is Not a Shortcut
The output label, connector, polarity and charging behavior all matter, and you cannot establish the approved combination by matching a plug in a product photo. A certification mark on a charger is not the same as manufacturer approval for your particular battery. Nor does the same brand name mean that two generations use interchangeable chargers.
If the original charger is lost, damaged or appears to have a different label from the manual, leave the bike uncharged until the equipment is identified. Send clear label photographs to support. You should not have to guess your way through a purchase or test a borrowed charger to learn whether it fits.
Charge the Battery Step by Step
Charge On or Off the Bike?
Use the arrangement permitted by the exact model manual. A removable pack is not permission to charge it anywhere you like. Check the location's rules, the battery removal instructions, the weight you must handle and where the charger can connect directly to a suitable outlet. Don't carry a pack up stairs or balance it awkwardly just to follow generic advice to charge indoors.
| Question | Charging on the bike | Charging off the bike |
|---|---|---|
| Does the manual permit this setup? | Confirm the bike and port instructions | Confirm the pack removal and separate-charge instructions |
| Is the location allowed and suitable? | Check parking and charging rules, outlet and exit clearance | Check battery-only rules, outlet and exit clearance |
| Can you handle the equipment safely? | Keep the bike stable and charger uncovered | Use approved handholds and do not force a stuck pack |
The better option is the one your actual equipment and location allow, not the one a generic comparison table calls more convenient. If neither works, ask ACTBEST and the site manager for a permitted arrangement before charging.
Connect the Approved Charger
Start with the charger and battery undamaged, dry and identified. Read the connection sequence in the manual supplied for that equipment. Some systems differ; don't assume the wall plug or battery connector always goes first. If the connector resists, feels loose or shows visible damage, stop and ask for the correct equipment rather than forcing it.
- Identify the instructions. Use the manual supplied for your bike and battery. Our manual library is organized by model; if the labels or instructions don't match your equipment, ask us before connecting it.
- Check condition and location. Confirm the battery, port, charger and cable are undamaged and dry, and the charging location is allowed.
- Check charging conditions. An otherwise healthy battery brought in from hot or cold conditions must reach the conditions permitted by its manual. Cooling down is not a remedy for abnormal battery heat or other warning signs.
- Turn off and connect as instructed. Follow the exact connection sequence in the model manual. Don't force a resistant connector or operate the bike during charging.
- Remain present and watch for changes. Use that charger's instructions to interpret its indicator. An unfamiliar light pattern is a reason to pause and check, not a reason to substitute another charger.
- Disconnect as instructed when finished. Close the port cover if fitted, then put the charger where its cable will not be damaged.
Monitor and Disconnect
Know what your charger's indicator means before relying on its color. Red and green are not a universal code. If the light pattern changes unexpectedly, or charging takes much longer or ends much sooner than usual, record the pattern and consult the instructions. Do not assume a specific failed cell or battery-management system from a light alone.
Stay present. If an abnormal battery heat, odor, shape change, leakage or hissing appears, get clear and follow the emergency guidance, not the normal disconnect step. For an unfamiliar indicator without physical warning signs, stop by the manual's normal procedure and contact support before another attempt.
When charging finishes normally, disconnect in the manual's order. Check the cable and plug for new visible damage and store the charger dry with the lead protected from sharp bends, crushing and heat. Close the charging-port cover if your bike has one. Don't leave a fully charged pack connected throughout a long idle period.
You need not stand over the charger, but "present" means able to notice a problem and leave safely. Don't tuck the pack behind boxes or close it inside a cabinet so that you cannot see what is happening. A charger that is warm in ordinary operation is not proof that its battery is healthy; a new smell, melting, unexpected noise or unusual heat changes the decision immediately. Do not approach a visibly failing pack to feel its temperature.
How Long Does an E-Bike Battery Take to Charge?
Use the Exact Battery and Charger Reference
Use the stated time for the exact battery and approved charger as a planning reference, not a timer that overrides the equipment's instructions. For example, the current Summit listing states 4-6 hours for its listed 48V 12Ah battery and 54.6V/2A charger. That manufacturer specification, checked September 29, 2026, is not a promise for another ACTBEST model or a partly charged pack.
The old shortcut, battery amp-hours divided by charger amps, describes only an idealized constant-current period from empty. It does not know the pack's starting state, the charger's changing output near full, temperature limits or protective pauses. Adding a fixed percentage to the result does not make it an accurate charge-time chart. I'd plan from the exact model's stated range, then watch the approved charger's indicator as the manual directs.
| You have | Useful for planning | Not enough to conclude |
|---|---|---|
| The exact model's battery and approved charger instructions | Its stated time and indicator behavior | That another pack charges in the same time |
| A partly charged battery | How much of the route remains and when you can supervise charging | A precise finish time from display bars alone |
| A charge that takes unexpectedly long or stops early | A record of starting indication, elapsed time and light pattern | Which internal component failed |
If charging hasn't finished when you need to leave or sleep, disconnect according to the manual and resume when you can monitor it. Don't solve a scheduling problem with an unapproved faster charger.
Unexpectedly long charging, repeated early stops or an indicator you cannot identify should be reported with the model, charger label and exact behavior. They do not, by themselves, tell you which component has failed.
When and How Often Should You Charge?
Plan around your next ride and your battery's instructions. Don't deliberately run the pack empty just to start a charging routine, and don't leave it connected indefinitely after charging.
For a longer ride, allow time to charge while you can be present. For a period without riding, use the storage guidance below instead of borrowing a daily percentage target from another brand. A few dashboard bars are not a precise measurement of remaining energy or a guarantee that you can finish a particular route.
Daily Use and a Longer Ride
You don't need to make every ordinary charge a full discharge followed by a full refill. Charge when your next trip requires it, using your model's instructions and a time window you can supervise. A short top-up may make sense before a commute; it doesn't need a made-up "ideal" display-bar threshold.
Before a long ride, work backward from the approved charger's stated planning time and the time you will actually be home. A range claim from the product page is not a promise about that ride. If you cannot complete a supervised charge, plan a shorter route or a different travel option. Do not leave it plugged in while asleep just because tomorrow's trip is important.
First Charge and New-Battery Myths
For a new bike, use the supplied battery and charger instructions before the first ride. The first-charge directions for one pack are not an instruction to run every new lithium-ion battery to empty. Don't invent a full-discharge "conditioning" cycle or repeat it to make a display look calibrated. If your exact manual specifies a commissioning or calibration procedure, follow that procedure; otherwise a normal approved charge is the relevant task.
If the battery or charger labels don't match the included paperwork, pause and have ACTBEST identify them. This is easier to resolve before the first connection than after an unfamiliar indicator appears.
Stop Charging: Warning Signs and Emergency Actions
For smoke, flames, venting or a battery warning such as unusual heat, swelling, leaking, odor or hissing: stop using the device, get yourself and others away, and call 911 in the U.S. from a safe location. Do not handle the pack, try to carry it outside or approach it to unplug a charger. FDNY's battery safety guidance calls for immediate discontinuation of use and contacting emergency services when warning conditions appear.
For physical damage discovered while the equipment is cool and inactive, with none of the warning signs above, do not use or charge it. Keep people away and contact the manufacturer or local fire authority for safe handling advice. A cool pack that is swollen, leaking or smells unusual still belongs in the emergency branch. Do not open the case or ship a damaged battery without specific instructions.
An unfamiliar charger light without physical warning signs is a different branch. Stop the charge using the normal manual procedure, record the pattern and ask support before another attempt. If a physical warning sign appears, switch to the emergency response.
Never put a lithium-ion battery in household trash or general recycling. The USFA guidance directs owners to battery recycling. Call the receiving facility first for damaged or recalled packs; don't transport one as though it were an ordinary spent battery.
Charging in Real-Life Situations
In an Apartment or Shared Building
Check the lease or building's current battery and charging rules, then compare them with the model manual. A bike room, hallway and apartment unit may have different permissions; a place to park may not be a place to charge. If the only outlet is near a door or in a bedroom, do not use that location. FDNY advises against charging in bedrooms, near exits or with an extension cord.
Ask the property manager where supervised charging is permitted if the rules are unclear. Don't rely on taking the battery upstairs as a workaround until you have confirmed both the building rule and the bike's removal and storage instructions. A dedicated charging room still needs the correct charger, an unobstructed escape path and a person present during the charge.
At Work or on Campus
Ask facilities or the relevant office whether charging is allowed, where and under which equipment rules. A workplace outlet or a campus bike rack is not permission by itself. A residence hall may distinguish bringing in a bike, carrying a removable battery and charging either one. If you cannot remain present under the site's arrangements, plan charging elsewhere rather than leaving it at your desk all day or overnight.
For a campus rule that asks for certification evidence, deal with that separately from the choice of outlet. A safe charging habit does not grant building approval.
After Rain or Washing
Don't plug into a wet port. For an otherwise undamaged bike with ordinary surface moisture, follow the model's wet-weather care instructions. Our rain protection and after-ride care guide separates surface care from exposure that calls for stopping use and charging. Don't blow air into the connector or rely on a fixed drying timer as proof that the inside is dry.
If the battery was submerged, its housing or port may have taken water inside, or a connector has corrosion, stop and ask for model-specific advice. A dry-looking exterior does not establish that the interior is safe. Heat, swelling, odor, leakage or smoke take priority over any drying routine: use the emergency branch.
After Hot or Cold Storage
Check the battery's permitted charging conditions before connecting it. A normal pack kept outside the manual's charging range should adjust naturally in a location where you may store it. Keep it away from direct sunlight and hot vehicles; don't use a freezer or external heat to hurry the process. If you see unusual heat or any other warning sign, this is not a temperature-wait problem.
On the Road, in a Hotel or in an RV
Ask the operator or host about battery and charging rules before you depend on a hotel room, campground outlet or shared garage. Do not charge on a bed, in a sleeping area or across the route out. Remain present and use only the approved charger.
For an RV or a portable AC supply, check the actual charger's input and the electrical system's instructions before planning a charge. Outlet shape alone cannot establish that an inverter, adapter or improvised 12V setup is suitable. If you cannot confirm a permitted power source and supervise the whole session, wait for a suitable charging location. Secure a removed pack against falls and impacts during travel; don't leave it loose in a vehicle or a hot parked car.
Store an E-Bike Battery Between Rides and Seasons
A Short Pause in Riding
Disconnect after charging as instructed and keep the bike or removable battery in a dry, permitted location within its specified storage conditions. Avoid direct sun, hot cars and combustible storage. Follow both the exact model's restrictions and the location's rules; ask for clarification if they conflict.
A canceled ride is not a reason to leave the charger attached or create an improvised discharge setup.
Long-Term and Winter Storage
Before a planned long pause, read your pack's instructions for charge level, location, temperature and checking schedule. Some manufacturers give specific storage percentages and dates; another brand's numbers are not ACTBEST instructions. Also check whether your exact bike may be stored inside the building and whether removal of its battery is permitted. Storage and charging are separate permissions.
Record the last charge date and the indication you actually see, then follow the model-specific checking interval. Avoid leaving a pack at an unmonitored outlet or treating a dashboard bar graph as a precise state-of-charge reading. If the manual is missing or ambiguous, ask ACTBEST for the schedule before leaving it for a season.
It Is Already Full, and I Cannot Ride for Weeks
First, check the condition. A normal-looking full battery and a swollen or overheating battery do not belong in the same storage plan. Any warning signs take you back to the safety response above.
For an otherwise normal battery:
- Disconnect the charger normally. Do not leave it connected throughout the idle period.
- Read the battery's storage instructions. Look for the approved charge level, location, temperature and checking interval. Use the instructions for your actual pack, not another model's percentage.
- Explain the constraint if the instructions don't answer it. Tell ACTBEST that it is already full, how long it will sit, and whether you can safely ride or remove it. Ask for the approved next action and checking schedule.
- Avoid makeshift discharge. Don't attach wires or resistors, open the battery, or run the motor on a stand to use up charge. Don't ride while injured or unable to control the bike merely to reach a target number.
While you obtain clarification, keep the otherwise normal equipment disconnected from the charger in a suitable, permitted location. Do not treat "ask support" as a reason to leave it in heat, in a blocked exit or attached to power.
You can send this short message through ACTBEST support:
My bike is [model and version], with battery [label/model]. I last charged it on [date], and the display currently shows [actual indication]. I expect not to ride until [date]. It is stored at [location and conditions], and I [can/cannot] safely remove the battery or ride the bike. There are no visible warning signs. Please confirm the approved action for an already-full pack, the storage conditions and when I should check it again.
If there are warning signs, do not use that normal-storage message. Follow the safety response first.
Keep the reply and set a reminder for the checking date it specifies. Write down the indication you actually see rather than converting bars into an invented percentage.
Remove or Transport a Battery Only as Instructed
Turn the bike off and follow its exact release, removal and reinstallation instructions if the pack is removable. Support its weight with the approved handholds. Don't pry a stuck latch, pull on a cable, touch exposed contacts or assume a generic carrying-weight figure. Ask for help when the lift, stairs or grip are beyond what you can safely manage.
If you move the bike or battery in a car, protect it from impact, rolling cargo and excessive heat. Don't improvise a shipping or air-travel plan from a general e-bike article: carrier, battery condition and route requirements need their own confirmation. A damaged, swollen, leaking, unusually hot or odorous pack is not a routine transport job; follow the emergency and handling advice above.
Before Riding Again
Inspect the case, port and cable for damage or new warning signs before charging or reinstalling the pack. If everything appears normal, follow the model's installation, charging and pre-ride instructions.
If the battery will not charge or behaves differently after storage, contact support with the storage record. Don't jump-start it, open it or repeat experimental charging attempts.
E-Bike Battery Charging Troubleshooting
These checks apply only without unusual heat, swelling, leakage, odor, smoke, hissing or another physical warning sign. If any appears, leave the troubleshooting path and use the safety response.
The Charger Light Does Not Turn On
Read the indicator description and connection order for that exact charger. Check that the permitted wall outlet is working only if you can do so without touching damaged or wet equipment. A charger may show a different light when it isn't connected to the pack; no light is not by itself a battery diagnosis. Don't open its housing, try a borrowed charger or keep reseating a loose connector. Record the labels and behavior for support.
The Battery Does Not Begin Charging
Check the ordinary basics: Is the battery already indicated as full? Are the normal connection steps complete? Is an otherwise healthy pack within its allowed charging conditions? If a plug resists, a port is wet or a case is damaged, stop. If nothing obvious resolves the issue, send the exact model, battery and charger labels and light pattern to ACTBEST. A long-idle battery that refuses to charge is not a reason to jump-start it.
Charging Stops Early or Takes Much Longer
Note the starting indication, elapsed time, outlet and charger indicator, then consult the exact manual. An early stop does not prove which battery-management component has failed; an unusually long session is not permission to leave it unattended overnight. If it repeats, pause further attempts and ask support for the approved diagnosis. If an abnormal physical sign develops, get clear and use the emergency branch.
The Charger or Battery Seems Unusually Hot
Do not diagnose abnormal heat by touching or approaching the pack. If the battery is excessively hot or the charger or connector is melting, smoking, odorous or noisy, move yourself and others clear and call emergency services as appropriate. "Wait and retry" is not a response to those signs. For a concern without physical danger, stop by the normal procedure and ask support before another charge.
It Shows Full but Range Has Changed
Write down the actual display indication, ride conditions and change you noticed. Wind, hills, load and assist setting affect the distance you can ride; bars alone cannot measure pack health. A sudden or repeated change deserves a support check, not a home discharge test, an extended charge to "balance" the cells or a guessed replacement pack.
Common Questions
What Is the Best Way to Charge an E-Bike Battery?
Inspect the equipment, use the supplied or specifically approved charger and the model's connection order, charge in a permitted clear area while awake and present, then disconnect as instructed. Stop using or charging if the battery shows a physical warning sign.
Can I Leave an E-Bike Battery Charging Overnight?
No. Charge when you are awake and present. If it cannot finish before bed, disconnect as instructed and resume later.
Can I Charge an E-Bike Battery at Home?
Only when the model instructions and your building's rules permit the location and you can follow the safe setup. Keep exits clear, avoid bedrooms and extension cords, use the approved charger and remain present. If those conditions cannot be met, ask the building for a permitted alternative.
Should the Battery Be On or Off the Bike While Charging?
Use the setup permitted for your exact bike and battery. Turn the bike off or otherwise prepare it as its manual directs. Removable does not mean that either arrangement is approved in every location.
Can I Use Another Charger's Plug If It Fits?
Only use a charger supplied or explicitly approved for the exact battery by the manufacturer. A fitting connector is not a compatibility test.
How Do I Know When It Is Fully Charged?
Read the approved charger's own indicator instructions. Do not assume that a particular color or the bike display's bars mean the same thing across models. Disconnect as instructed when the normal completion indication appears.
Should I Charge After Every Ride?
Not necessarily. Plan the next ride using the battery's instructions and a supervised charging window. You do not need to run it flat before a normal charge, and an idle period calls for the model's storage guidance instead.
Should I Discharge a Full Battery Before Storage?
Follow the actual battery's storage instructions. If it is already full and you cannot ride safely, obtain a model-specific plan rather than inventing a discharge method.
Can I Charge After Riding in the Rain?
Not with a wet port, suspected internal water intrusion or battery warning signs. Follow the model's wet-weather instructions and contact support when its condition is uncertain.
Can I Charge a Cold Battery?
Only when an otherwise healthy pack has reached the charging conditions in its exact manual. Do not use a universal wait time, heater or direct sun to speed it up. Abnormal heat, damage or odor belongs in the safety response, not this routine.
Can a Modern Charger Overcharge an E-Bike Battery?
Do not rely on a general claim about battery-management protection as permission to use a different charger or leave a charge unattended. Use the charger approved for your exact pack, follow its completion indication and disconnect as directed. If charging behaves abnormally, stop and ask for the approved check.
Must I Remove the Battery for Storage?
Follow the exact model's instructions and the location's rules. If removal is allowed but you cannot do it safely, ask for an approved alternative instead of forcing the lift.
Final Charging Checklist
Undamaged equipment. Approved charger. Permitted location. Correct connection sequence. Someone present. Normal disconnection when finished.
For a long break after a full charge, add one more job: get the storage instruction for the battery you actually own. You need a workable plan, not an electrical experiment.
Share:
How to Upgrade Your eBike to Go Faster Without Breaking the Law
Ebike Classes 1, 2, and 3: What Sets Them Apart?