
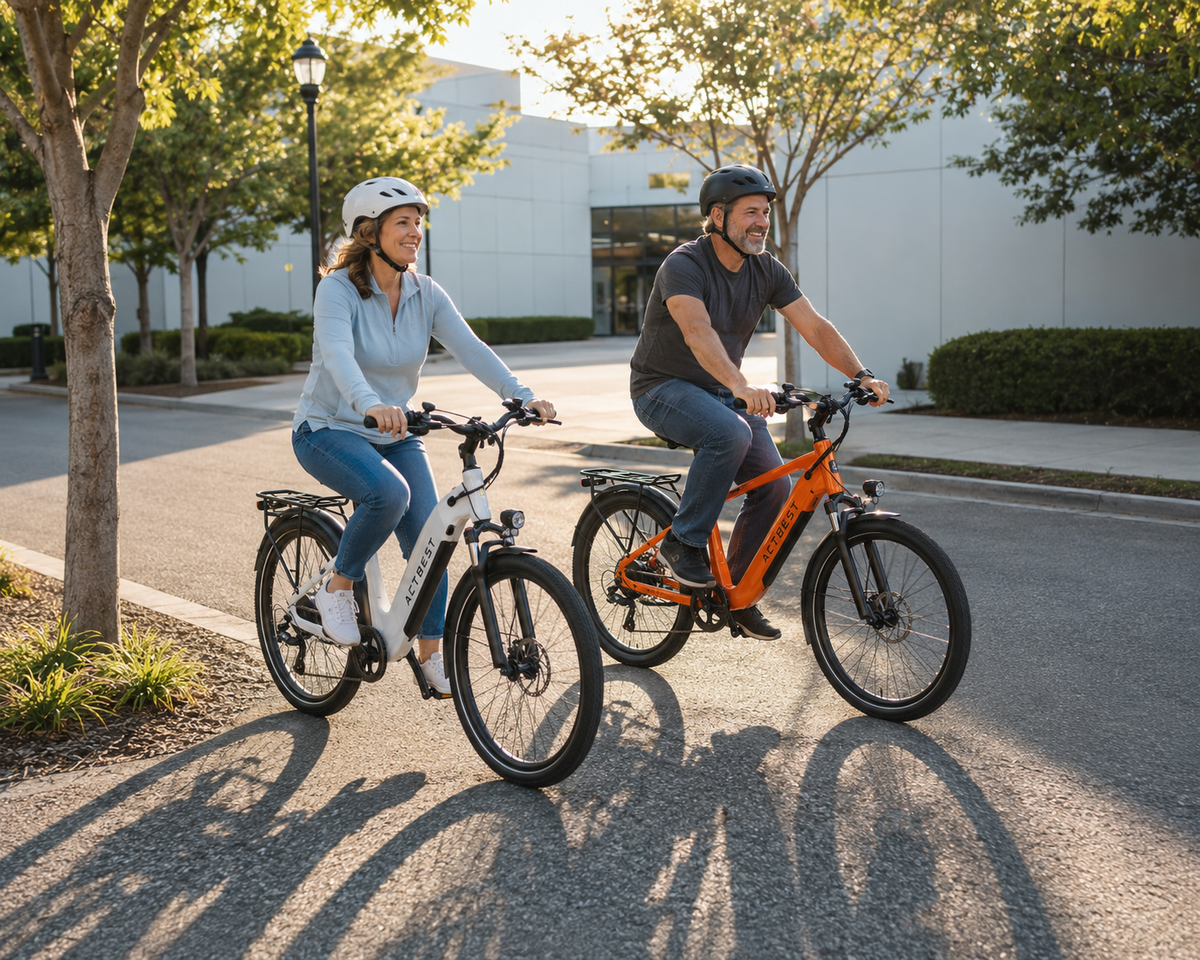
Using an e-bike to commute to work or school is the best alternative to a car. It’s quick, easy, and doesn’t leave you drenched in sweat thanks to the battery. There are just a few things you need to remember. That’s where an e-bike commuting checklist comes in handy.
An e-bike commuting checklist is a repeatable routine covering the bike, route, battery, equipment, destination, and journey home. It covers basic things like testing the bike on your intended route, checking whether you’ve got enough battery range for the journey, and getting a properly fitted helmet.

But it also covers the things you don’t think about: a suitable lock, a flat tire plan, and the right clothing for rain, heat, and sun.
The One-Page E-Bike Commuting Checklist
Don’t leave your bike checks to the last minute. Use this checklist to prepare everything the night before. That includes a quick safety check, getting your belongings and accessories ready, and performing a periodic check of your bike’s essentials.
You can print it, save it to your phone, or adapt it to your usual route. At least until it’s locked into your memory.
Night Before
£ Check the weather for both the morning and return journeys.
£ Look for roadworks, trail closures, or public transport disruption.
£ Check the battery level and charge it if necessary.
£ Test or recharge your front, rear, and backup lights.
£ Pack suitable layers, rainwear, gloves, or sun protection.
£ Prepare your lock, flat kit, bags, and work essentials.
£ Make sure panniers, baskets, and rack bags are attached securely.
£ Confirm your backup transport in case riding is no longer practical.
Before Leaving
£ Check both tires for visible damage or obvious pressure loss.
£ Squeeze both brake levers and make sure the brakes engage normally.
£ Check that the wheels are secure and turn without unusual rubbing.
£ Test the display, pedal assist, throttle, and other controls.
£ Make sure the battery is charged and locked firmly into position.
£ Turn on the front and rear lights, even during poor daytime visibility.
£ Secure your cargo and keep straps away from the wheels and drivetrain.
£ Compare the battery level with the total distance you expect to ride.
At Work or Your Destination
£ Lock the frame to a fixed, permitted cycle stand or anchor.
£ Secure a wheel as well when the location or parking time warrants it.
£ Remove the battery or display only when the manufacturer permits it.
£ Charge only if the building allows it and you have the approved charger.
£ Never charge a wet, damaged, swollen, leaking, or unusually hot battery.
£ Hang wet clothing somewhere it can dry before the return journey.
£ Check the return route, forecast, and likely light conditions.
£ Keep your helmet, keys, lock, and riding essentials together.
Before the Return Ride
£ Check that the remaining battery can cover the journey home.
£ Turn on your lights before leaving a dark building or car park.
£ Recheck the tires, brakes, battery mounting, and cargo.
£ Make sure no lock, cable, or loose strap remains near a wheel.
£ Review any weather warnings, road closures, or transport disruption.
£ Change your route if conditions have become less predictable.
£ Use your backup plan if the bike, battery, route, or weather is unsafe.
Weekly Commuter Check
£ Check tire pressure, tread, cuts, and embedded debris.
£ Inspect the brakes for wear or changes in performance.
£ Clean and lubricate the chain when required.
£ Look for loose fasteners or unusual movement.
£ Test the lights and recharge any removable units.
£ Check the rack, fenders, basket, and kickstand mounts.
£ Inspect your lock, keys, bracket, and any security cables.
£ Check the charger, cable, plug, and battery connector for damage.
£ Record recurring noises, warning codes, or handling changes and arrange qualified servicing when necessary.
Set Up the E-Bike for Daily Comfort and Control
Fit and Riding Position
If you commute every day, you spend a lot of time in the saddle. The wrong posture can gradually turn into severe discomfort and long-term issues. That’s why it’s worth taking the time to adjust the bike.
Check the saddle height — you should be able to control the pedals without forcing your hips to rock. Then adjust the handlebars so you’re not locking your elbows or straining your shoulders. You want to be able to pull the brake levers easily.
Next, practice getting on and off the bike. How does the frame work with your regular work clothes? Do your clothes make it difficult to get over the top bar?
Cargo and Carrying
How much stuff do you need to bring to work? If it’s just a backpack’s worth, you probably won’t have any issues. If it’s more, you should consider panniers or rack bags.
Panniers keep weight lower and remove it from the rider’s back, while rack bags suit smaller daily loads. Either way, it’s smart to line your storage with waterproof material.
You will also want to check the load limits of the bike, rack, and individual panniers. For the bike itself, add everything you’re putting on the bike, including your own weight, to see how it compares with the total payload capacity.
Fenders, Kickstand, Mirrors, and Other Utility
The last thing you want is to arrive at work with dirty pants. Fenders reduce spray on wet roads, so you don’t spend the day with mud on your legs.
Other helpful additions include:
- A stable kickstand helps while loading cargo but must suit the bike and load.
- A mirror may help riders monitor traffic without repeatedly turning, although it does not replace a shoulder check.
- A bell or other warning device may be required locally.
- A rear rack must be compatible with the frame and its approved mounting points.
Just remember that everything you add increases the e-bike’s weight and lowers its efficiency. It can also interfere with cables, lights, steering, and folding mechanisms, depending on the model.
Plan Battery Range and Charging
Using an e-bike for commuting isn’t just about getting from A to B. It’s also about getting back from B to A. You want to ensure you’ve got a suitable round-trip e-bike range — or a reliable option to charge the e-bike at work.
Calculate the Full Round Trip
There’s a simple equation to follow:
Required route distance = outward journey + return journey + planned errands or detours
Don’t shorten the journey arbitrarily or ignore the 3-mile errand you have to run every Friday. You want to include everything you might do.
That could include:
- Both commuting legs
- The distance to secure parking
- Lunch or school-run journeys
- Shopping stops
- Regular diversions
- Distance added by avoiding unsafe roads
- A possible return to retrieve something forgotten
Once you’ve calculated the range you actually need, you can compare it with the advertised range of your preferred e-bikes. Check out our guide to real-world e-bike range for commuting.
Add a Realistic Reserve
The advertised range for an e-bike isn’t what you can expect in the real world. Most riders face hills, changing weather, heavier loads, and faster speeds than the e-bike was tested under.
That’s why you want to add a realistic reserve.
Factor in the challenges on your journey. If you ride over several hills, you want a bigger reserve than someone who does a quick 1-mile commute on flat ground. Base the reserve on your own test rides so you can be as accurate as possible. No one wants to find themselves several miles from home with a low battery, hoping they can make it.
Decide Where Charging Fits
For short commutes, charging isn’t much of an issue. It’s when the miles start to stack up that it becomes a question: are you charging at work or at home?
If you’re charging at work, you’ll need the approval of your employer or the building’s management. It’s best to opt for an e-bike with a removable battery. You don’t want to bring your entire e-bike into the office.
Always use the correct charger in a safe, undamaged outlet. Don’t charge the battery if it is wet or the temperature exceeds the manufacturer’s recommended limits.
The CPSC advises riders to remain present during charging.
Create a Low-Battery Plan
What happens if you find yourself low on battery? Maybe you had to take an unexpected detour, or you just forgot to charge up. Is there a safe, viable alternative?
It’s sensible to create an ordered response:
1. Reduce assistance or throttle use where it is safe to do so.
2. Avoid unnecessary detours and aggressive acceleration.
3. Choose a safer, shorter route rather than attempting to maintain speed.
4. Check whether the relevant transit operator accepts that bike and battery.
5. Arrange a pickup or use alternative transport.
6. If necessary, leave the bike securely parked and recover it later.
Test the Route Before the First Workday
|
What to assess |
What to look for |
Your rating |
|
Traffic stress |
Traffic speed, vehicle volume, and difficult merges |
Low / Medium / High |
|
Cycling space |
Protected lanes, painted lanes, shoulders, or quiet streets |
Good / Mixed / Poor |
|
Road surface |
Potholes, loose gravel, drain covers, mud, or standing water |
Good / Mixed / Poor |
|
Junctions |
Busy crossings, difficult left turns, and disappearing bike lanes |
Easy / Mixed / Difficult |
|
Visibility |
Street lighting, blind corners, parked cars, and sight distance |
Good / Mixed / Poor |
|
Hills |
Long climbs, steep starts, and likely battery use |
Easy / Mixed / Difficult |
|
Alternative |
Another street, crossing, or transport option if conditions change |
Available / Limited / None |
Prioritize Comfort and Predictability Over Car Speed
Riding an e-bike along a main road can be stressful. No one wants to commute to work next to speeding cars. Instead, pick a route that reduces the complexity and risk.
Focus on protected lanes, lower-traffic streets, and less complex intersections. The shortest driving route might not always be the most practical cycling route. Opting for the slightly longer bike lane route might reduce stress and danger.
Mark Risk and Decision Points
New to commuting by bike? It’s smart to mark the biggest danger points on a map. That could include:
- Unprotected left turns
- Fast or complex merges
- Broken pavement, drain covers, and recurring debris Railway or tram tracks
- Sections that become dark
- Temporary construction
- Steep starts
- Missing shoulders or disappearing bike lanes
Just noting them down beforehand can prompt you to slow down, take the lane where lawful, cross the street, or rethink your route. Even just dismounting temporarily can be sensible if the area is difficult to ride through.
Complete a Weekend Test Ride
Performing a test run on the weekend at the same time of day can give you a rough idea of the journey. You’ll learn the door-to-door journey time, how the battery fares, and any particularly difficult spots. You can also check the parking at your workplace and note how to access it.
For a more realistic test, wear your work clothes and bring the cargo you normally would. You’ll uncover any issues, giving you time to resolve them before you have to do it for real.
Check Local Rules
Local rules dictate where you can and can’t ride. Check your local jurisdiction’s rules for roads, sidewalks, shared paths, helmets, lighting, and access. Use state, municipal, trail-manager, and transit-operator sources rather than relying on a general national summary.
Commuter Safety, Visibility, and Essential Gear
Essential Safety Equipment
Commuting with an e-bike is mostly safe. But there are a few risks. Wearing the right safety gear can protect your body, minimize the risk of a collision, and keep you safe on the roads.
Most of all, you need a properly fitted bicycle helmet. It can protect your head in the event of a crash, reducing the chance of a concussion.
Other safety equipment includes:
- Working front and rear lights
- Visible or reflective clothing
- A bell
- Emergency contact identification
NHTSA recommends a properly fitted helmet, visible clothing, lights in low light, predictable riding, and pre-ride checks of components such as tires and brakes.
Repair and Recovery Equipment
The most common e-bike issue is a flat tire. Carrying a spare inner tube or compatible puncture-repair kit is invaluable. It means you’re not stranded if the tire does deflate. You might need a tire lever and a pump or inflator suitable for the valve type.
It’s also smart to pack a multi-tool for basic repairs. For things like the motor, belt drive, or other complicated components, you probably don’t want to make a roadside repair.
Workday Comfort
You don’t need to wear full Lycra just to commute to work. However, gloves, eye protection, and a breathable waterproof shell are excellent for daily cycling. Pick shoes that are suitable for both pedal grip and your destination. If in doubt, pack a spare pair of shoes — and a spare pair of socks.
The weather can change throughout the day. Opt for removable layers rather than one heavy garment, so you don’t get too warm or cold.
Don’t Overpack
It’s tempting to bring everything. But more equipment means more weight and more items to secure. Pack for likely problems rather than every possible breakdown. Keep heavy items low, prevent straps from hanging loose, and never exceed the bike or rack limits.
Match the Locking Plan to Parking Risk
|
Parking situation |
Main risk |
Minimum locking action |
Additional precaution |
|
Short visible stop |
Opportunistic theft |
Lock the frame to a fixed anchor |
Keep the bike within view |
|
Short stop out of sight |
Theft while you are away |
Use a strong lock through the frame |
Secure a wheel and remove easy-to-take accessories |
|
Several hours at work or school |
More time for attack |
Use a strong primary lock through the frame |
Secure a wheel and prefer monitored parking |
|
Access-controlled bike room |
Other users or intruders gaining access |
Lock the frame to an internal anchor |
Do not rely on the locked door alone |
|
Train station or transport hub |
Long parking time and predictable routine |
Lock the frame and a wheel to a fixed stand |
Use a second lock and vary your parking position |
|
No suitable fixed anchor |
The complete bike can be carried away |
Find another permitted parking location |
Never rely on a loose, removable, or easily cut object |
|
Garage or shed at home |
Concealed theft with more time available |
Lock the frame to a fixed ground or wall anchor |
Keep doors locked and the bike out of view |
|
Overnight or isolated parking |
Prolonged, higher exposure |
Avoid when possible |
Use indoor storage, registration, tracking, or insurance where appropriate |
Short Stops Within Sight
Don’t assume the bike is safe just because you didn’t go far. Even a short stop requires the frame to be locked to a fixed object. Remove easily detached valuables and avoid leaving the bike running or unlocked while collecting food, entering a shop, or using an ATM.
Several Hours at Work or School
If you’re leaving your e-bike for several hours, you need a high-quality primary lock. Normally that’s a sturdy metal D-lock. A secondary lock can also be sensible around the wheels, especially if there’s a high risk of wheel theft.
Try to park the e-bike in a secure, monitored location with the lowest risk of theft.
Overnight or High-Risk Parking
Outdoor overnight parking is a risky proposition. If it cannot be avoided, combine a strong anchor, appropriate locks, good lighting, photographs of the bike, and, if possible, a tracking system. Check insurance terms because requirements and exclusions vary.
Choose a Good Anchor and Lock Placement
A good anchor is:
- Fixed securely to the ground or structure
- Closed at the top so the bike cannot be lifted off
- Thick enough to resist simple cutting
- Permitted for bicycle parking
- Free from loose bolts or obvious damage
Many places have bike-specific areas with anchors you can pass your lock around. That prevents thieves from easily pulling the anchor away.
Lock placement also matters. Pass the lock through the frame rather than around a removable component alone. Reduce empty space inside the lock, keep it away from the ground where practical, and position keyways and locking mechanisms so they are harder to reach with tools.
Workplace Charging, Storage, and Battery Rules
Ask About the Building Policy
Always ask whether you can store an e-bike battery at work. You’ll want to know whether the entire e-bike is allowed indoors or if removable batteries are treated differently.
Most buildings will have an area where you can store e-bikes safely. If you can charge inside, follow the building’s specific rules. Don’t assume that an available outlet means charging is permitted.
Use Only Approved Charging Equipment
Follow the manual for the exact bike and battery. Use the supplied or manufacturer-approved charger in a dry, open location where the charging equipment remains visible.
Inspect the battery, charger, cable, plug, and charging port before use. Stop if there is swelling, leaking, impact damage, an abnormal smell, unusual heat, or repeated error warnings.
The CPSC warns against incompatible “universal” chargers and advises unplugging the charger when the cycle is complete.
Plan for No Workplace Charging
If workplace charging isn’t an option, the obvious solution is to select an e-bike with a longer range. You can also adjust your e-bike’s settings to a lower assistance level to prolong the battery life.
Some models also permit you to buy additional battery packs. That can extend your range but will add more weight to the e-bike.
Handle a Wet or Cold Arrival Correctly
Consult the e-bike’s manual for drying, acclimation, and permitted charging temperature. Never charge a wet battery. If it’s too hot or cold, it’s usually best to let it reach room temperature before proceeding.
Use the current ActBest manuals for model-specific instructions.
Create a Weather and Clothing Plan
|
Condition |
What may change |
What to do |
What to take |
|
Rain |
Grip, braking, visibility, and road surface |
Slow down, leave more stopping space, and avoid abrupt turns |
Rain shell and waterproof bag |
|
Heat and sun |
Comfort, hydration, and battery temperature |
Carry water, use shade, and follow the bike’s temperature guidance |
Breathable layers and sun protection |
|
Cold |
Comfort and available battery range |
Add a realistic range reserve and protect your hands |
Warm layers and suitable gloves |
|
Strong wind |
Stability, effort, and battery use |
Reduce speed and allow more energy for a headwind |
Close-fitting outer layer |
|
Darkness |
Your visibility and ability to spot hazards |
Use a familiar, well-lit route where possible |
Charged front and rear lights, plus a backup light |
Rain
E-bike commuting in the rain doesn’t just mean wearing a waterproof jacket. Wet surfaces can reduce traction, while water, spray, and low cloud can reduce visibility.
It’s best to slow down, increase stopping distance, and avoid abrupt steering or braking. Use fenders and waterproof cargo protection, especially if you’re transporting electronic equipment. Most e-bikes can withstand some rain, but water resistance doesn’t mean they can handle all wet conditions.
Heat and Sun
Heat and sun are less of an issue for e-bikes. The only real concern is leaving the battery exposed to hot temperatures or direct sunlight for prolonged periods. Riders should also wear breathable clothing and stay properly hydrated.
Cold and Wind
Cold conditions can temporarily reduce battery performance. It’s a concern during a winter e-bike commute. Strong headwinds also increase how hard the motor has to work, reducing the e-bike’s range.
Darkness and Seasonal Changes
As the days shorten, it’s a good time to check your e-bike’s front and rear lights. Carry backup lights or batteries if the route has limited lighting, and wear reflective details.
If the route is poorly lit during winter, it might be smart to swap routes, even if it means going a little further.
Build a Backup Plan Before You Need It
|
Problem |
When to stop riding |
What to do next |
Recovery option |
|
Flat tire or mechanical fault |
The bike cannot be controlled safely |
Move away from traffic and repair it only if you can do so safely |
Bike shop, public transport, or pickup |
|
Low battery |
The remaining charge may not cover a safe route |
Reduce assistance and head towards a secure destination |
Transit, pickup, or secure parking |
|
Battery or charger problem |
You notice damage, unusual heat, leaking, swelling, or repeated warnings |
Stop using the affected equipment |
Contact ActBest support or a qualified technician |
|
Severe weather or unsafe route |
Visibility, grip, flooding, traffic, or access becomes unsafe |
Find shelter or leave the route |
Alternative route, transit, delay, or pickup |
|
Theft or missing bike |
The bike is gone or appears to have been disturbed |
Prioritize your safety and document what happened |
Property staff, police where appropriate, and your insurer |
|
Illness, fatigue, or delay |
You no longer feel able to ride safely |
Secure the bike and use another form of transport |
Collect the bike later |
Flat Tire or Mechanical Problem
If you suddenly find you’ve got a flat tire or mechanical issue, you’ll want to move out of traffic. Give the e-bike a thorough inspection and only attempt the repair if the location is safe and you know what you’re doing.
Carry a flat tire repair kit and a basic multi-tool to help with simple roadside repairs. Otherwise, have a plan for who you can call to get picked up.
Battery or Charger Problem
The battery is one of the most dangerous parts of an e-bike. Never use any battery that is damaged, swollen, leaking, unusually hot, or producing repeated warnings.
Do not substitute an unapproved charger. If the battery is simply low, conserve assistance and head toward a safe destination. Use manufacturer support or qualified servicing for abnormal electrical behavior.
Severe Weather or Unsafe Route
Define the conditions you consider unsafe: flooding, ice, lightning, poor visibility, or strong winds are good examples.
It’s tempting when you’re already halfway to your destination to keep pushing on. But if you’re dealing with unsafe conditions, it’s best to stop and reevaluate.
Theft or a Missing Bike
Do not confront a suspected thief. Check with property or security staff, document the location and time, and report the loss through the appropriate local channel.
Have your serial number, registration details, purchase details, and photographs ready so you can quickly prove a bike is yours.
Illness, Fatigue, or Schedule Disruption
If the rider becomes unwell, overtired, or too rushed to ride safely, secure the bike and use another form of transport. Confirm beforehand whether the bike can remain at work overnight and how it will be collected. Do not let lateness become a reason to ride beyond personal or legal limits.
Pre-Ride, Post-Ride, and Weekly Maintenance
Before Every Ride
£ Check the tires for damage or obvious pressure loss.
£ Test both brakes before entering traffic.
£ Make sure the wheels feel secure.
£ Test the lights, display, and controls.
£ Check the battery level and confirm it is locked in place.
£ Secure bags and keep straps away from moving parts.
£ Investigate any unusual noises or warning messages.
After Each Ride
£ Dry the bike and battery connections if they became wet.
£ Check for damage after any impact or particularly rough journey.
£ Recharge the battery and lights when necessary.
£ Unpack wet clothing or equipment.
£ Store the lock, helmet, and commuting gear together.
£ Record any recurring noises, warnings, or handling changes.
Weekly Commuter Maintenance
£ Check tire pressure, tread, cuts, and embedded debris.
£ Inspect the brakes for wear or reduced performance.
£ Clean and lubricate the chain when required.
£ Look for loose or damaged fasteners.
£ Check the rack, fenders, basket, and kickstand mounts.
£ Inspect the lights, lock, charger, cables, and connectors.
£ Arrange qualified servicing for persistent faults or electrical warnings.
Your First Week of E-Bike Commuting
Day 1: Test the Route and Timing
Give yourself plenty of time on the first day to ride the route. Plan for delays and stressful interactions. Find a safe place to park and keep track of the actual door-to-door duration.
Day 2: Check Range and Charging
Once you know approximately how long the journey takes, you can plan for range. Try different routes and see whether you prefer a high or low assistance level. Confirm whether workplace charging is actually necessary.
Day 3: Refine Cargo and Clothing
By day 3, you’ve got an idea of what is and isn’t useful. Remove the equipment that went unused unless it serves an important emergency purpose. Adjust layers based on whether you arrived cold, overheated, or wet.
Day 4: Test the Parking Routine
Use the real parking anchor and complete the full locking sequence. Remember to attach the lock to a non-removable part of your frame and consider a second lock if practical.
Day 5: Finalize the Routine
Turn the week’s results into a standard routine. Set usual departure and charging times, save backup contacts, store equipment together, update the checklist, and note any maintenance problems.
Common E-Bike Commuting Mistakes
Everyone makes mistakes when they start commuting to work. But there are a few that you really want to avoid:
· Treating advertised maximum range as guaranteed. Think of the max range as ideal, not standard. Load, assistance level, hills, rider weight, and weather conditions can all reduce range.
· Trying the route for the first time on a workday. Give yourself a practice run to discover difficult junctions, tough hills, inaccessible parking, and any other issue you didn’t think about.
· Charging without workplace permission. An available outlet does not override building rules. Confirm where charging and battery storage are allowed.
· Using a weak lock for long-term parking. Thieves can get past weak locks with a set of bolt cutters. If you’re leaving your bike for more than a few hours, use a sturdy, reliable lock.
· Having no fallback journey. A flat tire, low battery, severe weather, illness, closure, or security problem should not leave you stranded.
E-Bike Commuting FAQs
Is an e-bike good for commuting?
It can be. You’ll need the right bike, a manageable route, and enough range to get there and back again. If in doubt, test the route to see if it suits you.
How long does a 10-mile e-bike commute take?
That depends on the e-bike and route. Hills, junctions, and legal speed limits can significantly slow you down. The only real estimate comes from cycling the route yourself.
What should I pack for an e-bike commute?
You’ll want to bring the essentials: a helmet, working lights, an appropriate lock, weather protection, and a basic flat-tire repair kit. Include identification, emergency contacts, and a protected way to carry electronics or documents.
How often should I charge a commuter e-bike?
That depends on the e-bike. Always ensure you have enough charge for every leg of the journey, plus a substantial reserve in case anything goes wrong.
What should I avoid when commuting by e-bike?
Avoid riding faster than conditions or local rules allow, using distracting devices, relying on maximum advertised range, parking with an inadequate lock, charging with incompatible equipment, and riding with unresolved brake, wheel, tire, steering, frame, or battery problems.
E-Bike Commuting Checklist: Final Thoughts
An e-bike commuting checklist turns the bike, route, battery, equipment, destination, and journey home into a repeatable routine. Prepare everything you can the night before, test the route, and keep a backup plan ready in case the bike, battery, route, or weather becomes unsafe.
Share:
E-Bike Maintenance Guide: Schedule, Checklist, and Safe DIY Care
Electric Bike Waterproofing: Practical Tips for Rainy Rides